Road Trip Dashcam Footage Tips for Memorable Drives
TL;DR:
- Proper dashcam setup involves selecting 1080p at 60fps for daily recording and reserving 4K for scenic segments, with deliberate mounting behind the rearview mirror at a downward angle. Managing storage by formatting the SD card inside the dashcam and calibrating G-sensor sensitivity to low or medium prevents false event locks and data loss. Using multi-channel systems and reviewing footage on a computer enhances storytelling, while manual exposure adjustments and CPL filters improve daylight image clarity.
Road trip dashcam footage tips are the practical settings, mounting choices, and storage strategies that determine whether your video captures a clear, usable record or a blurry, overexposed mess. Most drivers mount a camera and hit record without adjusting a single setting, then wonder why their footage looks washed out at noon or unreadable at dusk. Whether you’re documenting a cross-country route on a Sony STARVIS sensor camera or using DriveSight on a spare Android phone, the difference between forgettable and cinematic comes down to a handful of deliberate decisions before you leave the driveway.
1. How to choose the right dashcam settings for road trip footage
The single most important decision in road trip video recording is resolution and frame rate. 1080p at 60fps delivers the best balance of sharpness and manageable file size for most road trips. That combination captures fast-moving highway traffic clearly without filling a 128GB card in a single afternoon.
Reserve 4K recording for special scenic legs of your trip, not the entire journey. 4K files consume storage three to four times faster than 1080p, which means a 256GB card becomes a real minimum requirement the moment you switch to that resolution. For a five-day trip, that math adds up fast.
- Resolution: 1080p at 60fps for daily driving; 4K only with 256GB or larger cards
- Loop recording: Set clips to 3-minute segments for easier file management and lower corruption risk
- WDR/HDR: Enable wide dynamic range to handle the contrast between bright sky and shaded road
- Exposure (EV): Manually set between -0.3 and -0.7 in bright conditions to prevent blown-out highlights
The “auto” exposure setting is one of the most common failure points. Auto exposure fails in high-contrast environments like desert highways or mountain passes where bright sky and dark road appear in the same frame. Manually testing your EV setting before departure takes two minutes and saves hours of unusable footage.
Pro Tip: Set your EV to -0.3 and record a 30-second test clip in your driveway at midday. Pause on a license plate 10 to 15 meters away. If you can read it clearly, your exposure is correct for daytime driving.
For travelers who want a deeper breakdown of resolution tradeoffs, the best dashcam video settings guide from DriveSight covers each parameter with real-world examples.
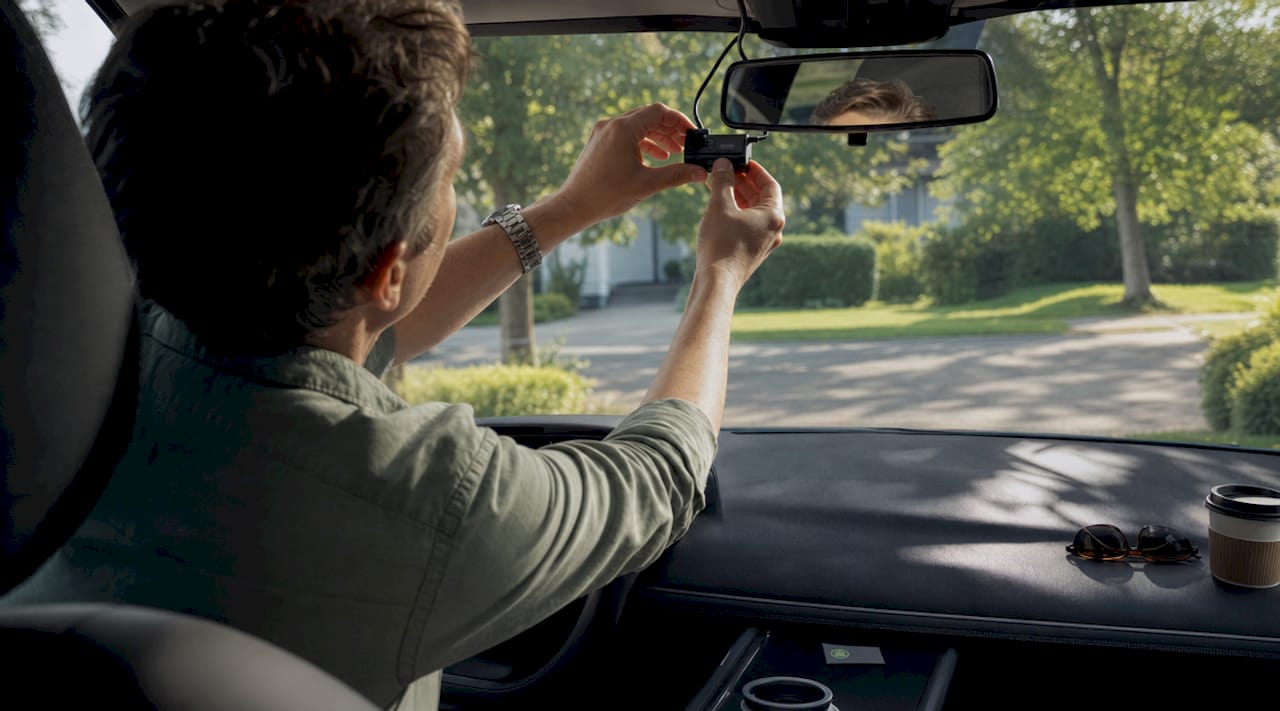
2. Best dashcam mounting locations and angles for road trip clarity
Where you mount your dashcam determines what the lens actually sees, and most drivers get this wrong on the first attempt. Mounting behind the rearview mirror is the standard recommendation because it provides a clear sightline across the full hood width while staying out of the driver’s peripheral vision.
Follow these steps to get the angle right before you leave:
- Position the camera behind the mirror, centered on the windshield, not offset to the passenger side.
- Angle the lens downward so roughly 60% of the frame shows road and 40% shows sky. More road means more lane markings, license plates, and road signs captured.
- Avoid the dotted or tinted band at the top of the windshield. Many windshields have a ceramic frit band that distorts the image and reduces light transmission.
- Clean both the inside and outside of the glass before mounting. Dashboard reflections and dirty windshield films cause glare and starburst effects that no post-processing can fully fix.
- Route the power cable along the headliner and A-pillar, tucking it under the trim. A loose cable crossing the dashboard is a distraction and a safety hazard.
Pro Tip: A CPL filter (circular polarizing lens filter) screws onto the front of compatible dashcams and cuts windshield glare by a significant margin during bright daylight. It’s one of the most cost-effective upgrades for fall and summer road trips.
3. How to manage storage and file protection during long road trips
Storage management is where most multi-day road trips fall apart technically. A 128GB card is the practical minimum for a weekend trip at 1080p. For trips longer than three days, or any leg recorded in 4K, a 256GB card is the correct starting point.
| Recording Mode | Approximate Storage Per Hour | Recommended Card Size |
|---|---|---|
| 1080p at 30fps | 4 to 6 GB | 64GB for day trips |
| 1080p at 60fps | 7 to 9 GB | 128GB for weekend trips |
| 4K at 30fps | 20 to 25 GB | 256GB minimum |
The G-sensor is the feature most likely to silently ruin your trip footage. G-sensor sensitivity set too high causes the camera to lock and protect files every time you hit a pothole or a rough patch of highway. Protected files cannot be overwritten by loop recording, so the card fills with false-trigger clips and the camera stops recording new footage entirely. Set G-sensor sensitivity to low or medium for road trips, and reserve high sensitivity for urban driving where actual impacts are more likely.
Full formatting of the SD card within the dashcam menu before departure is non-negotiable. Formatting from a computer leaves hidden corrupt file fragments that the operating system cannot see but the dashcam will encounter mid-trip. A camera-level format takes 30 seconds and eliminates that risk entirely.
Pro Tip: Physically tap the camera mount firmly after setting G-sensor sensitivity. If the camera locks a file from that tap, the sensitivity is too high for road use. Adjust until only genuine impacts trigger the event save.
4. Using multi-channel dashcams for richer road trip storytelling
Single-channel cameras document the road ahead. Three-channel systems document the entire experience. Front, rear, and interior cameras working together capture the scenic route, the traffic behind you, and the reactions of everyone in the car simultaneously. That combination transforms dashcam footage from a safety record into a genuine travel document.
The benefits of a multi-channel setup for road trips include:
- Rear camera coverage for documenting tailgating, merging incidents, and the scenery receding behind you
- Interior infrared night vision for clear cabin recording after dark without a visible light source disturbing passengers
- GPS route overlay that embeds your speed and location data directly into the video file, giving every clip geographic context
- App connectivity via Wi-Fi for browsing and downloading footage to your smartphone without removing the SD card
Dashcam apps with Wi-Fi connectivity display a timeline of events including G-sensor locked files, making it easy to find the moment you crested that mountain pass or spotted wildlife on the roadside. That timeline view is far more useful than scrubbing through hours of raw footage on a laptop.
For Android users, DriveSight’s recording modes for Android drivers explains how to configure multi-perspective capture using a smartphone as the primary or secondary camera in a multi-device setup.
5. Post-capture review and enhancement tips for your dashcam road trip videos
Reviewing footage on the dashcam’s small screen tells you almost nothing useful about actual image quality. Review footage on a computer monitor to accurately assess exposure, sharpness, and whether license plates at distance are legible. What looks acceptable on a 2-inch preview screen often reveals significant problems at full size.
Here are the most effective post-capture steps for road trip footage:
- Adjust brightness and contrast in any standard video editor (DaVinci Resolve, CapCut, or Adobe Premiere Rush) to recover detail in underexposed evening clips
- Sharpen selectively on clips where the lens was slightly dirty or the focus was soft, but avoid over-sharpening, which creates noise artifacts
- Organize files by date and event type immediately after each driving day, before the volume of clips becomes unmanageable
- Use time-lapse effects in post-processing to compress long highway segments into cinematic sequences. DriveSight’s guide on dashcam timelapse setups shows how to produce these from standard loop-recorded footage
- Export highlight clips at 1080p for social sharing, even if the source footage was recorded in 4K, to keep file sizes practical for upload
Starting your driving days early also pays dividends in post-processing. Early morning departures produce footage with fewer vehicles in frame, softer directional light, and cleaner compositions that require less correction in editing. The footage practically edits itself when the road is empty and the light is golden.
Key takeaways
The best road trip dashcam footage requires correct resolution settings, deliberate mounting placement, and G-sensor calibration before departure, not adjustments made mid-trip.
| Point | Details |
|---|---|
| Resolution and frame rate | Use 1080p at 60fps as the default; switch to 4K only with a 256GB or larger card. |
| Mounting position | Place the camera behind the rearview mirror and angle for 60% road in the frame. |
| G-sensor calibration | Set sensitivity to low or medium to prevent false event locks from road vibrations. |
| SD card preparation | Format the card inside the dashcam menu before every trip to prevent corrupt footage. |
| Multi-channel storytelling | Add rear and interior cameras to capture the full trip experience, not just the road ahead. |
What we’ve learned from years of road trip recording
The most common mistake we see from road trippers is treating dashcam setup as a one-time task. They mount the camera once, leave every setting on auto, and never revisit the configuration. That approach works fine for a commute. It fails on a road trip where you drive through four different lighting environments in a single day.
The second mistake is over-relying on high G-sensor sensitivity as a safety measure. It feels intuitive that higher sensitivity means better protection. In practice, a card full of pothole-triggered locked files means your camera stopped recording 200 miles before the incident that actually mattered. Low to medium sensitivity, properly tested, protects real events reliably.
For gear, you do not need the most expensive hardware to get excellent footage. A mid-range dashcam with a Sony STARVIS sensor, paired with a quality CPL filter and a properly formatted 256GB card, outperforms a premium camera with default settings and a worn-out 64GB card every time. The settings and preparation matter more than the price tag.
We also recommend integrating your dashcam footage into your travel memories deliberately. Pull the best clips each evening, organize them by location, and you will have a complete visual record of the route by the time you get home. That record has real value, both as a personal memory and as documentation if anything goes wrong on the road.
— Cyberlab Automation
Capture every mile with DriveSight
DriveSight turns your Android phone into a fully capable dashcam with AI-powered detection, crash save, and cloud backup built in. No hardware investment required.
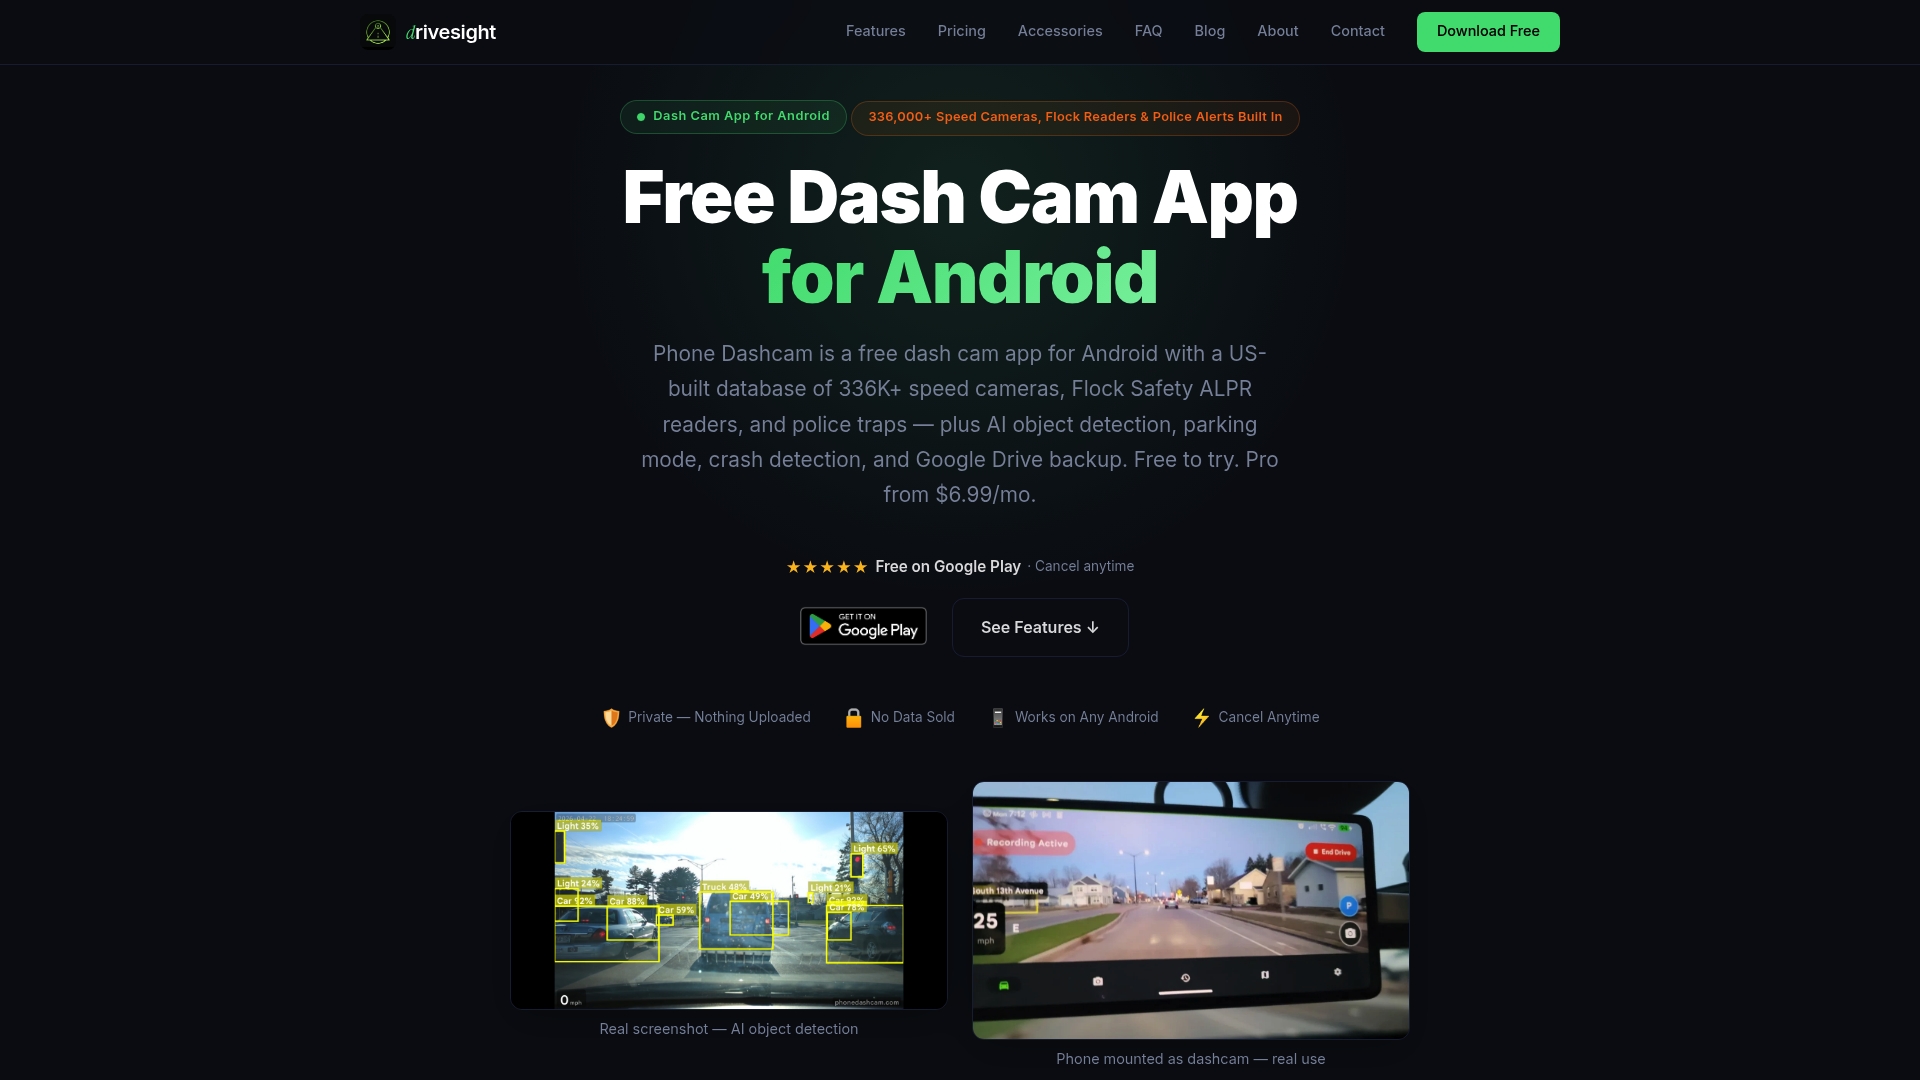
The DriveSight app supports loop recording, G-sensor event locking, and Wi-Fi footage review, giving you the same core features as a dedicated hardware unit on a device you already own. For travelers who want to protect footage during overnight stops, the parking security mode activates motion detection automatically when the car is parked. Download the free version and configure it using the tips in this article before your next departure.
FAQ
What resolution should I use for road trip dashcam footage?
1080p at 60fps is the recommended setting for most road trips, balancing image clarity with manageable storage consumption. Use 4K only when you have a 256GB or larger card and want maximum detail for specific scenic segments.
How do I prevent my dashcam from running out of storage mid-trip?
Format your SD card inside the dashcam menu before departure and set G-sensor sensitivity to low or medium. High G-sensor sensitivity fills the card with false-trigger protected files, which loop recording cannot overwrite.
Where is the best place to mount a dashcam in a car?
Mount the camera directly behind the rearview mirror, centered on the windshield. This position captures the full road width without blocking the driver’s sightline or creating blind spots.
Can I use a smartphone as a dashcam for road trips?
Yes. Apps like DriveSight transform an Android phone into a functional dashcam with loop recording, crash detection, and cloud backup. An older Android phone mounted on the windshield works as a dedicated unit without any additional hardware cost.
How do I improve dashcam footage quality in bright sunlight?
Set the manual exposure value (EV) to between -0.3 and -0.7 to reduce blown-out highlights, and add a CPL filter to cut windshield glare. These two adjustments together produce significantly clearer footage in high-contrast daylight conditions.
Recommended
- What is road trip dashcam recording explained: your driver’s guide
- Common Dashcam Setup Mistakes That Ruin Your Footage
- How dashcam apps capture and preserve your best drive moments
- Dashcam timelapse recording: Real examples and smart setups
Get Phone Dashcam free
Loop recording, crash detection, GPS tracking, and AI object detection — all in your phone. No new hardware required.
Download Phone Dashcam