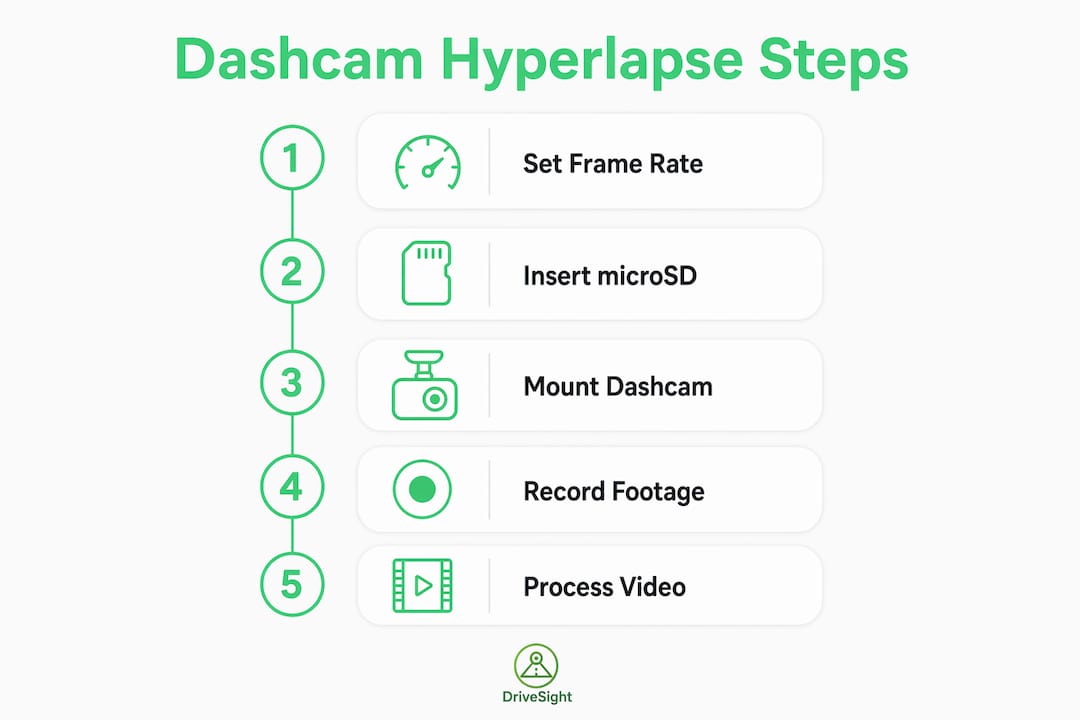
How Dashcam Captures Hyperlapse Road Footage
How Dashcam Captures Hyperlapse Road Footage
TL;DR:
- Dashcam hyperlapse footage compresses hours of driving into minutes by recording at low frames and playback at normal speed. It offers significant storage efficiency, allowing 60 to 80 hours of footage on a single high-endurance microSD card. Proper mount position and interval settings are crucial for high-quality, stable, and visually appealing hyperlapse videos.
Dashcam hyperlapse road footage is created by recording frames at a much lower rate than standard video, then playing them back at normal speed to compress hours of driving into minutes. This technique, more formally called time-lapse video, turns a security device into a creative storytelling tool. Car enthusiasts and content creators use it to document road trips, mountain passes, and cross-country drives in a format that is actually watchable. The result is cinematic, storage-efficient, and surprisingly easy to set up once you understand how the process works.
How dashcam captures hyperlapse road footage
A dashcam creates hyperlapse footage by dropping its capture rate from the standard 30 frames per second down to 1–10 fps. Playing those sparse frames back at normal speed makes the road appear to rush forward at high speed. The effect is the same whether your dashcam has a built-in time-lapse mode or you apply the compression in post-production.
The storage benefit is the real surprise. A 128GB high-endurance card stores 60–80 hours of driving in time-lapse mode versus just 6–8 hours at normal recording. That is roughly a 90% reduction in file size, which means a full weekend road trip fits on a single card without overwriting anything. For enthusiasts who want a complete record of a long drive, that efficiency changes everything.
This recording mode also shifts how you think about your dashcam. Instead of a device that captures evidence, it becomes a tool that captures narrative. DriveSight’s Android app supports continuous recording with storage management built in, so you can run time-lapse style sessions without babysitting the card.
What frame rate and storage settings actually matter
The technical gap between 30 fps and 1 fps is larger than it looks. At 1 fps, one hour of driving becomes a two-second clip at standard playback. At 10 fps, that same hour becomes roughly 12 seconds. Choosing where in that range to record depends entirely on how fast the road moves and how long you want the final video to be.
High-endurance microSD cards rated Class 10 and U3 are the minimum for reliable time-lapse recording. Time-lapse mode writes and deletes files far more frequently than standard recording, which wears out budget cards quickly. A card that fails mid-drive in summer heat takes your footage with it.
| Recording mode | Typical fps | Hours on 128GB | Best use case |
|---|---|---|---|
| Standard dashcam | 30 fps | 6–8 hours | Evidence, incident review |
| Time-lapse mode | 1–10 fps | 60–80 hours | Road trips, creative content |
| Post-processed hyperlapse | 30 fps raw | 6–8 hours raw | Full editing control |
Pro Tip: Format your microSD card in the dashcam itself, not on a computer. Dashcams use specific file allocation systems, and formatting on a PC can create write errors that corrupt footage mid-trip.
The write cycle stress on cards is real. Continuous time-lapse recording pushes U3-rated cards hard, but budget cards fail much faster under the same load. Brands like Samsung Endurance Pro and SanDisk High Endurance are built specifically for dashcam use. Check your dashcam video quality settings before a long trip to confirm resolution and frame rate are set correctly.
How do frame intervals and framing affect the final video?
Interval choice is the most creative decision in a dashcam hyperlapse tutorial. A 1-second interval works well on highways where the scenery changes fast. A 5-second interval suits city drives or winding mountain roads where slower movement needs more compression to feel dynamic. Getting this wrong produces footage that either crawls or looks chaotic.
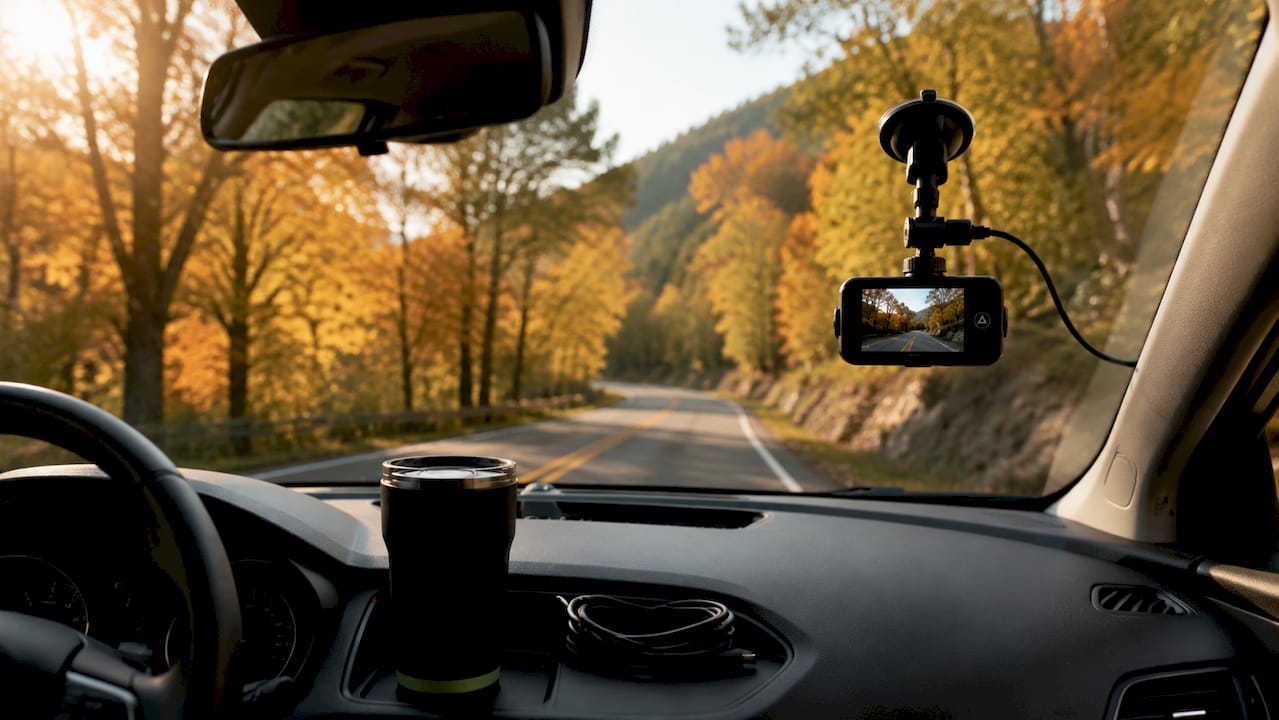
Camera placement matters just as much as frame rate. Framing 60% sky and 40% road balances the light sensor’s exposure across the full frame. Mount too low and the sensor overcompensates for the dark road surface, washing out the sky and losing the horizon detail that makes hyperlapse footage visually compelling.
Here are the key placement and interval decisions to get right before you drive:
- Highway driving: Use a 1-second interval. Scenery changes fast enough that longer intervals create gaps in visual continuity.
- City or suburban roads: Use a 3–5 second interval. Slower speeds need more compression to keep the video feeling energetic.
- Mountain or scenic routes: Use a 2–3 second interval. This preserves enough detail to show elevation changes and road curves.
- Framing: Position the camera so the horizon sits roughly 40% from the top of the frame. This keeps sky and road balanced.
- Mount arm length: Use the shortest, most rigid mount arm available. Micro-vibrations amplify in time-lapse playback and make footage look unstable.
Pro Tip: Test your framing in a parking lot before a long trip. Record 30 seconds, review the clip, and adjust the mount angle before you hit the highway.
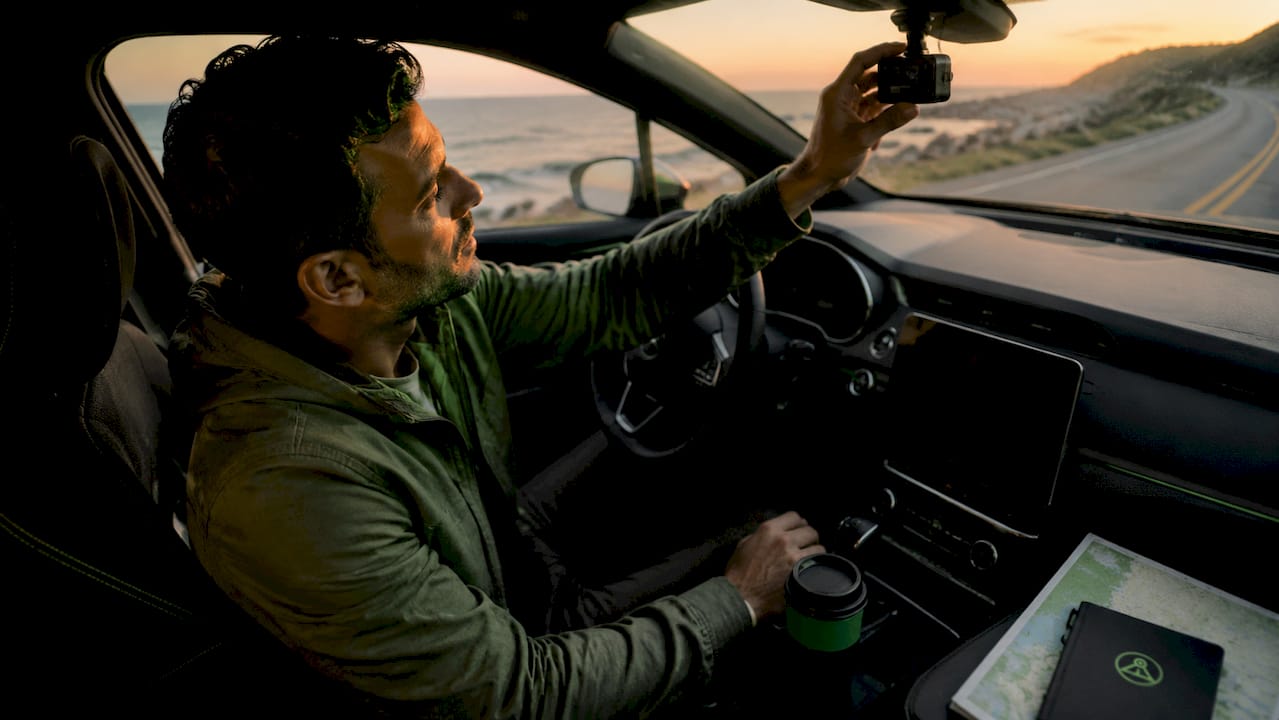
A slimline WiFi dash cam mounted close to the windshield with a short arm reduces vibration at the source. The closer the mount sits to the glass, the less flex the arm has to absorb road bumps.
How do you create hyperlapse videos from standard dashcam footage?
Not every dashcam has a built-in time-lapse mode. The good news is that standard 30 fps footage converts to hyperlapse in post-production with full creative control over the final result.
The industry standard for cinematic hyperlapse playback is an 8x to 20x speed increase. At 8x, a 30-minute drive becomes a 3.75-minute clip. At 20x, that same drive compresses to 90 seconds. Most editing software handles this with a single speed adjustment slider.
Here is a practical workflow from raw footage to finished video:
- Import and review clips. Load your dashcam footage into a video editor. Delete segments with no visual interest, like long stretches of identical highway.
- Apply speed increase. Set playback speed to 8x for scenic routes or up to 20x for long, repetitive highway sections. Preview before committing.
- Stabilize the footage. Apply a warp stabilizer or optical flow effect to reduce the visual impact of road vibrations. This single step separates amateur from professional-looking results.
- Color grade the clip. Dashcam footage tends to look flat. Boost contrast slightly, lift the shadows, and add a subtle warm tone for a cinematic feel.
- Add music. A well-chosen track transforms a speed-up drive into a genuine road trip montage. Match the BPM to the visual pace of the footage.
- Export and review. Export at 1080p or 4K depending on your source footage. Watch the full clip before sharing to catch any jarring cuts or exposure shifts.
FFmpeg automates frame selection for enthusiasts who prefer a command-line workflow. A single FFmpeg command can extract every 30th frame from a raw clip and compile them into a compressed hyperlapse without opening a full editing suite. This approach works well for long drives where you want to process multiple hours of footage quickly.
For beginners, apps like CapCut or DaVinci Resolve’s free tier handle the full workflow with visual controls. Advanced users get more precision with Premiere Pro or FFmpeg scripts that batch-process entire road trip archives.
Practical tips for road trip hyperlapse recording
Dashcams are set-and-forget tools by design. Once you configure the settings and mount the camera, the recording runs without any input from you. That hands-free quality makes them ideal for long drives where you want to focus on the road, not the camera.
These practical steps make the difference between usable footage and a card full of unusable clips:
- Use a hardwire kit for power. A USB power adapter works for short trips, but a hardwire kit connected to the fuse box delivers consistent voltage for multi-day drives without draining the 12V socket.
- Combine multiple angles. Pairing dashcam hyperlapse with a cabin-facing camera or a rear camera adds storytelling depth. Forward road footage alone gets repetitive over a long video.
- Set loop recording correctly. Configure loop recording to overwrite the oldest files first. This prevents the card from filling up and stopping the recording mid-drive.
- Protect key segments immediately. Most dashcams have a manual save button. Press it at scenic moments, tunnels, or interesting road sections to lock those clips from overwriting.
- Check storage before departure. A full card records nothing. Format the card the night before a trip and confirm available space before you start driving.
For road trip dashcam footage that tells a real story, plan your route with visual variety in mind. Coastal highways, mountain passes, and city approaches all produce distinctly different hyperlapse footage. Mixing these segments in the edit creates a video with natural pacing changes that holds a viewer’s attention.
Key Takeaways
Dashcam hyperlapse footage requires the right frame rate, a high-endurance storage card, and deliberate framing to produce results worth sharing.
| Point | Details |
|---|---|
| Frame rate drives compression | Recording at 1–10 fps compresses hours of driving into minutes of watchable footage. |
| Storage efficiency is significant | A 128GB high-endurance card holds 60–80 hours in time-lapse mode versus 6–8 hours at standard recording. |
| Interval choice shapes the video | Use 1-second intervals on highways and 5-second intervals on slower roads to control pacing. |
| Framing affects exposure quality | Position the camera for 60% sky and 40% road to prevent washed-out or underexposed footage. |
| Post-production adds full control | Speeding up standard footage 8x to 20x in editing produces cinematic hyperlapse without a built-in mode. |
What most guides get wrong about dashcam hyperlapse
The framing advice in most dashcam hyperlapse tutorials focuses almost entirely on frame rate. That is the wrong place to start. In our experience, the single biggest factor in footage quality is mount position, not interval setting. A dashcam mounted too low produces footage where the sky is blown out and the road looks like a gray smear. Adjusting the mount angle by just a few degrees changes the entire look of the video.
The other mistake we see constantly is using a long, flexible mount arm. Road vibrations that are invisible in standard 30 fps footage become obvious shaking in a 10x speed-up. A rigid, short arm costs almost nothing extra and eliminates the problem before it starts.
The “set and forget” quality of dashcam time-lapse recording is genuinely underrated. You start the drive, the camera runs, and you end up with a complete visual record of the journey. The creative work happens in the edit, where you have full control over pacing, music, and color. That separation between capture and creation is what makes dashcam hyperlapse a practical tool for enthusiasts who want results without constant camera management.
One thing worth adding: combining a forward-facing hyperlapse with even a single cabin shot transforms the footage from a road video into a road trip story. The viewer sees the road and the driver’s reaction to it. That context is what makes the difference between footage that gets watched once and footage that gets shared.
— Cyberlab Automation
DriveSight makes continuous recording simple
DriveSight’s Android app turns any smartphone into a fully functional dashcam with continuous recording, storage management, and remote viewing built in.
The DriveSight app supports loop recording and manual clip protection, so you never lose a key segment to an overwrite. Remote viewing lets you check footage from anywhere without pulling the card. For enthusiasts building a hyperlapse archive of their drives, the app’s timelapse recording setups page shows real examples of what the workflow looks like in practice. DriveSight runs on any Android phone, which means you can repurpose an old device as a dedicated road trip camera without buying new hardware.
FAQ
What is dashcam hyperlapse footage?
Dashcam hyperlapse footage is video recorded at a low frame rate (1–10 fps) and played back at normal speed, compressing hours of driving into a short, fast-moving clip. The technique is also called dashcam time-lapse recording.
What frame rate should I use for dashcam time-lapse?
Use 1 fps for highway driving and 5 fps for slower city or scenic roads. Lower frame rates produce more compression and shorter final videos.
Do I need a dashcam with a built-in time-lapse mode?
No. Standard 30 fps dashcam footage converts to hyperlapse in post-production by speeding it up 8x to 20x using tools like FFmpeg or DaVinci Resolve.
What microSD card works best for time-lapse recording?
Use a high-endurance card rated Class 10 and U3. Time-lapse mode writes and deletes files constantly, which wears out standard cards faster than normal dashcam recording.
How do I avoid shaky hyperlapse footage?
Mount the dashcam with the shortest, most rigid arm available to reduce micro-vibrations. Apply a warp stabilizer in post-production to smooth any remaining movement in the final clip.
Recommended
- How to Create a Time-Lapse from Your Dashcam Clips
- Road Trip Dashcam Footage Tips for Memorable Drives
- Why Dashcam Captures Wildlife Road Encounters
- Dashcam timelapse recording: Real examples and smart setups
Get Phone Dashcam free
Loop recording, crash detection, GPS tracking, and AI object detection — all in your phone. No new hardware required.
Download Phone Dashcam