Setting Up Dashcam Parking Mode for Daily Commuters
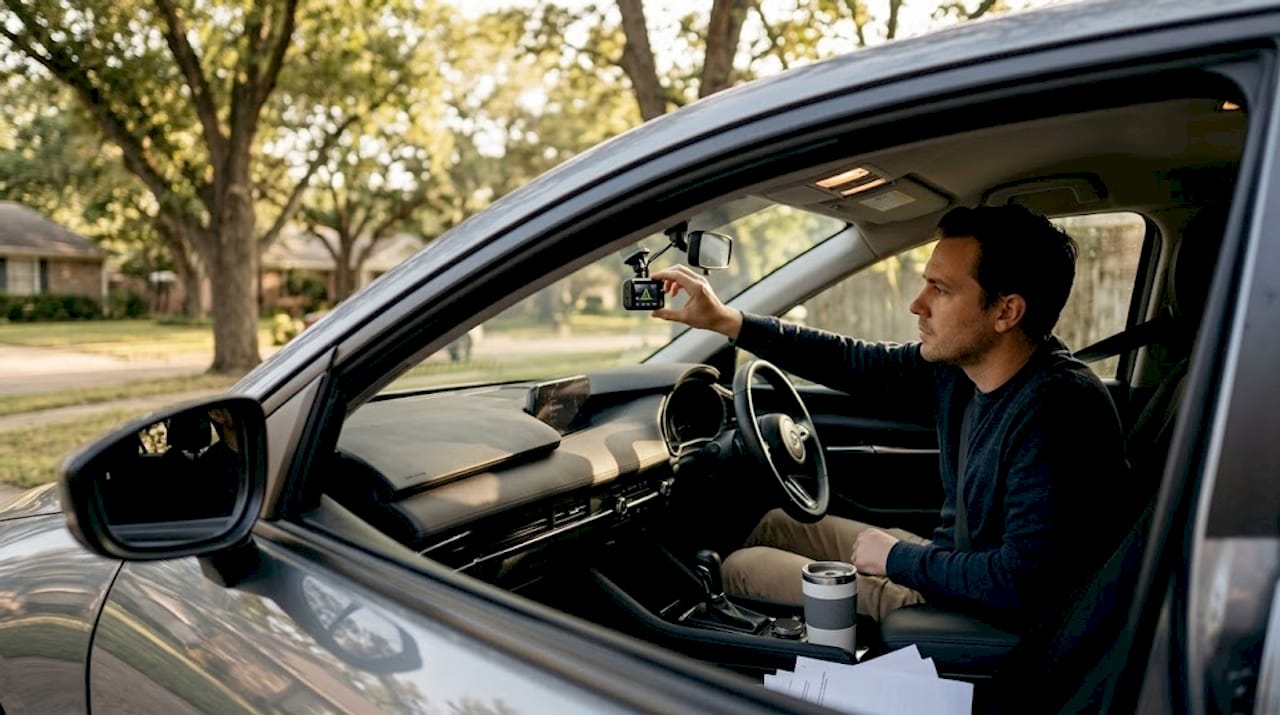
Every commuter knows the sinking feeling: you return to your car and find a fresh dent, a shattered mirror, or worse, and there is zero footage because your dashcam shut off with the engine. That gap in coverage is exactly what you need to enable dashcam parking mode for commuter vehicles to close. This guide walks you through what parking mode actually is, how to wire it correctly, how to configure it for your environment, and how to troubleshoot it when it does not behave as expected. Whether you are parking in a crowded office garage or a quiet suburban lot, these steps apply directly to your situation.
Table of Contents
- Understanding dashcam parking mode and its benefits
- Preparing to enable parking mode: tools, power options, and safety
- Step-by-step guide to enabling dashcam parking mode for commuters
- Troubleshooting and fine-tuning parking mode settings for optimal commuter use
- Why many commuters overlook proper power setup for dashcam parking mode
- Enhance your commuter security with DriveSight app and expert features
- Frequently asked questions
Key Takeaways
| Point | Details |
|---|---|
| Parking mode purpose | Parking mode enables your dashcam to record incidents when your vehicle is parked and turned off, increasing security. |
| Hardwiring power source | Using a hardwiring kit with fuse taps and a voltage cutoff allows continuous parking mode without draining your car battery. |
| Proper wiring critical | Correctly identifying constant and accessory fuses and ensuring a solid ground prevents common parking mode failures. |
| Adjust detection settings | Customizing motion and impact sensitivity reduces false alerts and adapts parking mode to your parking environment. |
| Use smartphone dashcams | Apps like DriveSight provide powerful, affordable parking mode options using your Android phone as a versatile dashcam. |
Understanding dashcam parking mode and its benefits
Before enabling parking mode, it helps to understand what separates it from standard dashcam operation. A regular dashcam powers on with the ignition and records while you drive. The moment you turn off the engine, it shuts down. That means every minute your car sits unattended, it is unprotected.
Parking mode changes that entirely. As parking mode allows dashcams to record even when the engine is off, capturing impacts, motion, or time-lapses of nearby activity. The camera stays active, watching your vehicle around the clock. For commuters who park in public lots or on the street for eight or more hours a day, this is not a luxury feature. It is essential coverage.
There are three primary recording methods parking mode uses, and each has a different impact on storage and battery life:
- Motion detection mode: The camera records only when movement enters the frame. Ideal for quiet lots where false triggers are rare.
- Impact detection mode (G-sensor): Records when a physical force is detected, such as a bump or collision. Useful in busy environments where constant motion would trigger too many clips.
- Time-lapse mode: Captures one frame every few seconds and stitches them into a condensed video. Uses the least storage and power, but misses fast events like a quick hit-and-run.
One critical detail most users miss: parking mode requires a continuous power source because the car’s ignition-switched circuit powers down when the key is removed. Without an always-on power connection, parking mode simply cannot function. Understanding this upfront saves a lot of frustration later. You can explore the full dashcam parking mode guide for a deeper breakdown of each mode’s tradeoffs.
Preparing to enable parking mode: tools, power options, and safety
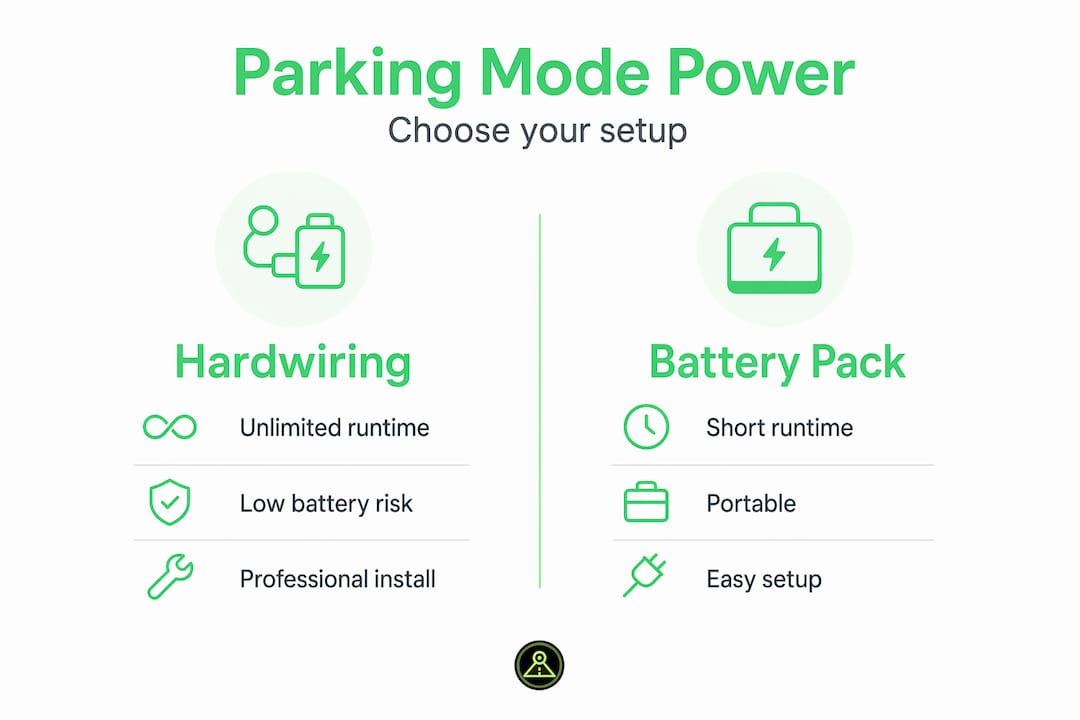
With parking mode basics clear, it is time to gather the right equipment and choose a power method that matches your commuter vehicle and parking routine.
There are three realistic power options, each with distinct advantages:
| Power method | Runtime | Battery risk | Installation effort |
|---|---|---|---|
| Hardwiring kit | Unlimited (with voltage cutoff) | Low with proper cutoff | Moderate |
| External battery pack | Up to 48 hours | None | Low |
| Internal dashcam battery | 1 to 6 hours typically | None | None |
Hardwiring with a low-voltage cutoff device is mandatory for safe, continuous parking mode without draining the car battery. The cutoff device monitors your battery voltage and shuts the dashcam down automatically before it drops to a level that would prevent the car from starting. Without it, you risk a dead battery at the worst possible moment.
External battery packs provide safe parking mode operation but with limited runtime, making them a practical option for commuters who park for shorter periods or who want a simpler, no-wiring solution.
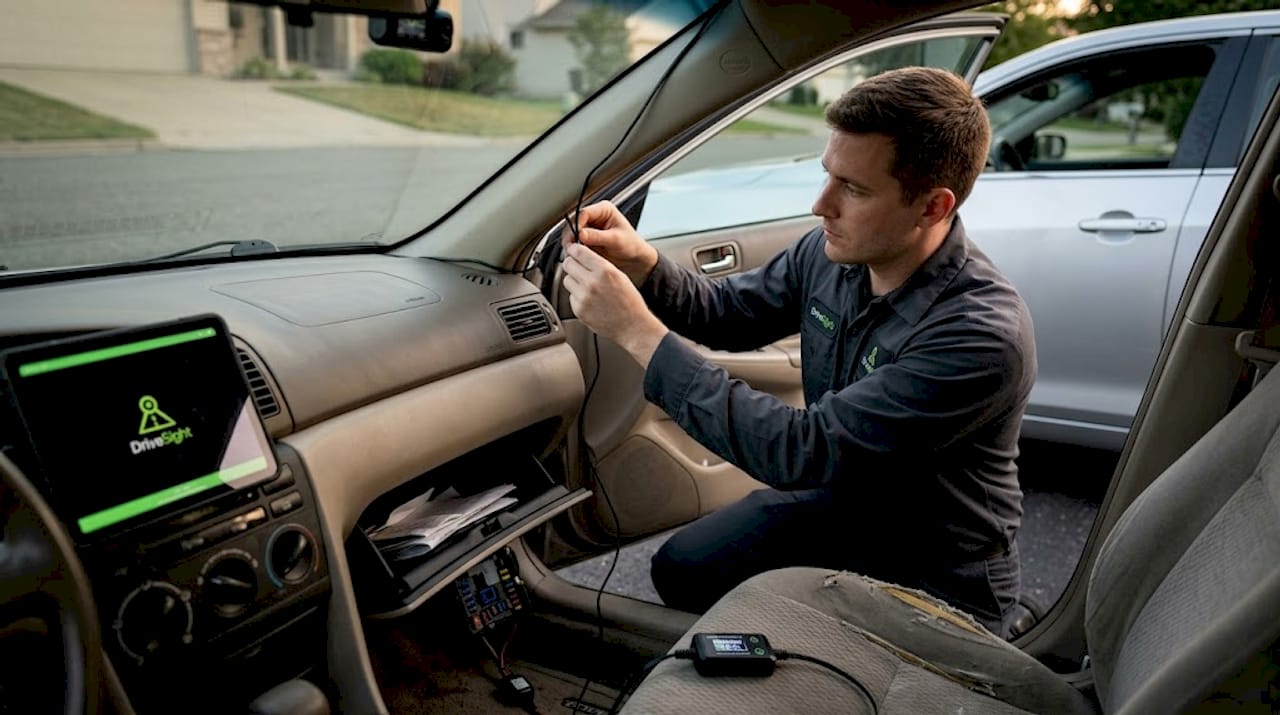
For hardwiring, gather these tools and components before you start:
- Multimeter: To identify constant and accessory fuses without guessing.
- Fuse tap kit: Typically includes both mini and ATO blade fuse taps to cover most vehicles.
- Low-voltage cutoff module: Built into most quality hardwiring kits; set it to protect the battery.
- Plastic trim removal tools: To pop off A-pillar covers without scratching interior panels.
- Ring terminal and bolt: For a clean, stable ground connection.
- Basic hand tools: Screwdrivers, zip ties, and electrical tape for securing and protecting wiring.
One safety point that cannot be overstated: keep all wiring away from your vehicle’s airbag system. The A-pillar area where you route dashcam cables often runs alongside airbag deployment zones. Interfering with that wiring creates a genuine safety hazard. Always route cables along the headliner or down the side trim, and secure them properly so they cannot vibrate loose or create a short. The phone dashcam features page covers how smartphone-based setups can simplify some of these installation concerns.
Step-by-step guide to enabling dashcam parking mode for commuters
Armed with the right knowledge and tools, follow these steps to successfully activate parking mode on your commuter dashcam.
-
Locate the fuse box. On most vehicles, the interior fuse box sits near the driver’s footwell or behind a small panel on the driver’s side dashboard. Some vehicles also have an under-hood fuse box, but the interior box is usually more accessible for dashcam wiring.
-
Identify the correct fuses using your multimeter. Set your multimeter to DC voltage. Test fuse slots with the car off and then with the ignition on. A fuse that reads 12V with the car off is your constant (always-on) power source. A fuse that reads 12V only with ignition on is your accessory circuit. Your owner’s manual or a fuse diagram helps narrow down candidates quickly. Interior lighting fuses and cigarette lighter fuses are common starting points.
-
Attach fuse taps correctly. Wiring fuse taps correctly, with yellow to constant power and red to accessory power, is the most commonly missed critical step. The dashcam uses the accessory signal to detect whether the engine is running and then switches between driving mode and parking mode accordingly.
-
Connect the ground wire. Route the black ground wire to a chassis bolt near the fuse box. The bolt must make contact with bare metal, not a painted surface or plastic. This is where many installations go wrong. An incorrect ground connection leads to unstable dashcam behavior including random restarts or failure to enter parking mode at all.
-
Route all wires neatly. Feed wires along the A-pillar trim, tucking them under the rubber door seal as needed. Use plastic clips or zip ties to keep cables flat and secure. Avoid bunching wires near moving parts or heat sources.
-
Connect the dashcam and test ignition power. Start the vehicle and confirm the dashcam powers on. This confirms the accessory circuit is live and correctly connected.
-
Test parking mode entry. Turn the car off and lock the doors. Wait 30 to 60 seconds. The dashcam should display a parking mode indicator, either a specific LED color, an on-screen icon, or a voice prompt depending on your model.
-
Set the voltage cutoff. Configure this on both the hardwiring module and within your dashcam’s app or settings menu. A cutoff of 12.2V is a reliable starting point for most commuter vehicles.
-
Verify recordings remotely. Use your dashcam’s remote viewer feature to review any parking events captured and confirm the footage quality and timestamps are accurate.
Pro Tip: Before finalizing the installation, test parking mode activation three times across different sessions. Some dashcams have logic delays or sensitivity thresholds that only reveal themselves with repeated real-world testing. Also review your dual dashcam setup options if you want both front and rear coverage during parking.
Troubleshooting and fine-tuning parking mode settings for optimal commuter use
Once set up, regular testing and tweaking ensure parking mode is reliable and optimized for your daily commute environment.
The most common issues commuters encounter after installation include:
- Dashcam does not enter parking mode at all: Usually a wiring issue. Verify with a multimeter that the constant fuse reads 12V with the car off, and that the accessory fuse reads 0V with the car off. If the accessory fuse still reads voltage with the ignition off, you have tapped a constant circuit instead.
- Dashcam powers off immediately when ignition is cut: The constant (yellow) wire may not be connected or may be seated in the wrong fuse slot.
- Excessive false event recordings: Very common in busy commuter lots. Busy lots produce false triggers with motion detection because passing cars, people, and shadows all register as movement. Switching to impact or time-lapse mode typically resolves this.
Ground quality issues and swapped fuse wires are the leading causes of parking mode failures and inconsistent recordings, often blamed incorrectly on the dashcam itself. Before replacing hardware, always verify wiring first.
Additional tips for fine-tuning:
- Lower G-sensor sensitivity to the middle setting if your dashcam records frequently from vibrations caused by nearby traffic or foot traffic on the asphalt.
- Enable timer-based cutoff if you park for long periods. A timer setting of 6 to 12 hours adds a second layer of battery protection beyond voltage cutoff alone.
- Test after every firmware update. Some dashcams include logic delays and ignition signal gates that behave differently after software changes. Retest parking mode activation after any app or firmware update.
The troubleshooting section of our dashcam parking mode guide covers additional edge cases specific to various dashcam models.
Pro Tip: Use a cheap USB power meter inline with your hardwiring kit during initial setup. It shows real-time voltage draw and helps confirm the camera is actually pulling power in parking mode, not just appearing active.
Why many commuters overlook proper power setup for dashcam parking mode
We have seen this pattern repeatedly: a commuter buys a well-reviewed dashcam, follows the quick-start guide, and then reports that parking mode “doesn’t work.” In almost every case, the hardware is fine. The problem is in the power wiring.
The key reason parking mode fails is not the camera but incorrect power wiring and improper voltage cutoff or ground selection. Manufacturers design these cameras to work well when wired correctly. The installation guides that ship in the box are often too brief to prevent the common mistakes.
The ground wire is the most underestimated part of the entire installation. Connecting it to a painted bolt or a surface that is not truly grounded to the chassis introduces resistance. That resistance causes voltage fluctuations, which the dashcam interprets as power instability, leading to random restarts or simply never entering parking mode. Ground quality and fuse wire swapping cause instability, false recordings, and battery drain, issues that commuters often blame on hardware when the fix is ten minutes and a bare-metal bolt away.
Sensitivity settings are another area where frustration builds quickly. A commuter who parks downtown and sets their dashcam to maximum motion sensitivity will return to a full memory card of street shadows and passing cyclists. That experience leads many people to disable parking mode entirely, which defeats the purpose.
Our experience tells us to treat parking mode setup as two separate tasks: the electrical task of wiring correctly, and the software task of configuring sensitivity, cutoff thresholds, and recording modes to match your specific parking environment. Combining both into a single setup session, and then testing across several real parking sessions before trusting the system, gives you a result that actually holds. For additional installation guidance, the DriveSight blog includes tips for a range of vehicle types and commuter scenarios.
Enhance your commuter security with DriveSight app and expert features
Parking mode setup does not have to involve expensive dedicated hardware. The DriveSight app by DriveSight turns your Android phone into a fully capable parking surveillance dashcam, complete with motion detection, impact alerts, and remote viewing, all without additional hardware costs.

The app’s parking mode setup is built specifically for commuters who need reliable coverage without complicated installations. You get customizable sensitivity settings, low-voltage cutoff integration, and the ability to repurpose an old Android phone as a dedicated parking monitor. The remote viewer lets you check footage and manage recordings from anywhere. It is a practical, affordable option that delivers genuine parking security for daily commuters.
Frequently asked questions
Can I enable dashcam parking mode without hardwiring?
Yes, many dashcams support parking mode using internal batteries or external battery packs, though these offer far shorter recording times. Internal battery mode lasts hours; external packs last up to 48 hours while hardwiring provides continuous power indefinitely.
How do I know which fuse to tap for parking mode hardwiring?
Use a multimeter to find a fuse that reads 12V with the car off for your constant circuit, and one that reads 0V with the car off for your accessory circuit. Correct fuse identification is critical for reliable parking mode operation, and interior lighting or radio fuses are common good candidates.
What voltage cutoff should I set to protect my car battery?
Set your voltage cutoff between 12.2V and 12.4V for the best balance of recording time and battery protection. Setting the cutoff below 11.8V damages batteries, and the recommended range keeps your car reliably startable.
Why does my dashcam not stay in parking mode after installation?
The most common causes are swapped constant and accessory wires, a poor ground connection to a painted surface, or parking mode being disabled in the dashcam settings menu. Reversed wires or bad ground cause parking mode failures, and bad ground connections cause instability that prevents the camera from staying active.
How can I reduce false parking mode recordings in busy parking lots?
Switch from motion detection to impact detection or time-lapse mode, and reduce G-sensor sensitivity to a middle setting. Busy lots produce many false triggers with motion detection, and impact or time-lapse modes with tuned sensitivity deliver far more accurate results.
Recommended
- Dashcam Parking Mode: How It Works on Android (2026 Guide)
- DriveSight Remote Viewer
- DriveSight Blog — Dashcam Guides, App Comparisons & Driving Tips
- DriveSight — Free Dash Cam App for Android
Get DriveSight free
Loop recording, crash detection, GPS tracking, and AI object detection — all in your phone. No new hardware required.
Download DriveSight